
Issue
Usually when Crash Magic is initially setup, only one or two users with logins are created by Pd’ Programming. This article will give the steps for adding a new user.
Explanation
Solution
1. Login to Crash Magic as an administrator (you must have Admin rights to do this).
2. On the left side you will see your group name, something like WA@Issaquah or MO@StLouis. Click on that group name to highlight it in blue. You may have to scroll down to find the group name.
3. Then on the top left side you’ll see an icon that looks like this:
![]()
Click on it.
4. This will make a new user and you will be presented with the following screen: 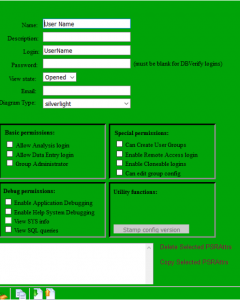
5. Fill out the User Name (this can be the full name). Then a login, usually first name with last initial or an email. Then give this user a password. We usually use abc123! as a first password to login with. Users can change their password on the login screen. Also fill in an email address for the user. This will allow Pd’ Programming to contact someone if there is a problem.
Note: If using an alternative login method such as Active Directory or DBVerify, you should still assign a password. That password can be used if the AD server doesn’t properly authenticate this user during login.
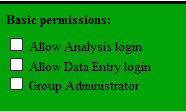
6. Then you’ll need to decide if the user should have Admin permissions, or just an Analysis login. (A user needs Admin permissions if they will be importing data). Click on the options you wish. First time users should probably only get Analysis login permission.
IMPORTANT: You will not be able to login to both the Crash Magic application, and the data entry application with the same login. However, you may create a separate login to use just for data entry. For example, if you have the Crash Magic login for Sam, you can create a login for SamDE. DE for Data Entry.
7. To save the updated user, just click back on the left side where it says “UserLogin”. This will change to the new user name you just added.
8. Logout by clicking on the button on the top right side of the screen.
![]()